Showing posts with label Chapter 22 Electrical System. Show all posts

Saturday, April 13, 2024

Avidyne IFD alert audio not working & seat foam cushions are ready for the upholsterer.

 I'm not getting alerts from the Avidyne IFD 540 and suspect the alert audio pins aren't connected to the audio panel's unswitched audio input #2.   My audio harness was built by ACS in order to get the warranty on the audio panel.  They did mis-pin one wire but is looking like they didn't pin the alert audio wires from the IFD to the audio panel.  We'll see.


I found this on line that I'll try.   If the audio is connected, I should hear chimes when I change volume.

https://pilotsupport.avidyne.com/kb/article/221-i-am-not-receiving-flta-alerts-on-my-ifd5xx4xx/

If there's no chimes, the audio isn't connected.   Bleh.  That will probably take a good 1/2 day to remedy.

- Update....  The alert audio was not pinned from the IFD to the audio panel.  It's connected now and can be verified by adjusting the alert audio and hearing a chime sound.


I got all the seat cushion foam cut last night.   Forgot to take photos before putting it in the box, so will try to get some for the blog and post them.  -Update - a separate blog entry was started for upholstery.


Wednesday, January 24, 2024

Minor maintenance - Alternator whine in GoPro audio

 Previously I'd installed a 470 uF cap across the essential buss but still have some alternator whine on the GoPro audio when playing back audio.   I installed a .47 uF mylar capacitor across the main alternator's output and ground to filter the AC ripple out.  The pitch trim motor also creates some noise but isn't terrible.  I'll see if the .47 uF cap resolves the whine and motor noise.  Also need to check whether the whine is worse using Com 1 or 2.  

Dynon database and charts were updated.  Connector screws were checked.  The copilot side display screws were a tiny bit loose but the connector was pretty secure.  I reseated the displays ethernet connectors and Wi-Fi dongles.  

I installed some more ferrite beads on unshielded nose gear wires that were close to the transponder antenna.

The fuel filter screen was cleaned and reinstalled.

Update - The GoPro audio alternator whine level seems improved.  It seems to make a difference which platform (Windows/iPad/iPhone/Linux) you watch it on and also how  high the volume is.  The noise is less raspy/buzzy than it used to be.


Wednesday, December 13, 2023

Alternator whine

 My ARINC 429 module went off line again recently.   I'd made a few changes but became suspicious that dirty power is the culprit.   For some reason, I'd never put a filter cap on the alternator.  Last night I pulled up one of my videos on my iPad and the alternator whine was very audible.  On a few others, noise from the trim motors can be heard.  It didn't seem to be very noticeable when I watch it on a desktop and think it's because I don't turn the volume up very much on my PC.  Some of the videos are recorded with an audio cable connected to the copilot's receive audio and others are recorded using the GoPro's mic.   Also, I'm not hearing alternator whine in my headsets.  

The commercially available filter cap is 15 microfarads and connects directly to the B lead on the alternator.   I pulled some caps out of a PC power supply that were 470 uF and will try one of those connected at the engine buss fuse panel (which is much closer to the avionics).  


Update-flight and video seem to indicate the whine is reduced but pitch trim motor noise is still audible.  The ARINC module stayed on line.  CHT temps are

Dynon Electric Landing Gear configuration

My gear and canopy warning indications are through Dynon's EMS220 which give indications on the panel and audible warnings through the audio panel.  For the landing gear, I made a voltage divider circuit out of resistors and connected it to the yellow wire going to the landing gear switch, the other side of the voltage divider connects to ground and the middle wire goes to the EMS220 contact.  The voltage divider reduces 12 volts to less than 5 which is what the EMS220 contact I used is rated for. 

Functionally, the "Check Gear" and "Gear Overspeed" audible warnings work well with the caveat that it takes about 20 seconds for the gear to fully extend, so getting the "Check Gear" on final may require a go around if there's inadequate time to extend the gear.

The canopy warning uses a magnetic door reed switch and the latch lever as contacts to complete the circuit.  A file was created and loaded into the Dynon HDX that only warns audibly about the canopy if the RPM goes over 1900 RPM while the canopy not latched.

A quick video of the HDX setup for several widgets:

https://youtu.be/PRun_iBb4Hc

Here's an excerpt regarding the landing gear configuration from the Dynon Forum:

https://forum.flydynon.com/threads/landing-gear-up-warning.5098/

Make sure you're looking at the latest version of the manual. Here's the relevant excerpt from those pages:

Contacts Used for Retractable / Amphibious Landing Gear and Related Alerts
The simplest method to monitor landing gear state is to use a contact as there are only two states to monitor and it is mechanically and electrically easiest to install. To enable audio alerts related to landing gear status, the contact used for monitoring the status of landing gear must be named GEAR:
SETUP MENU > EMS SETUP > SENSOR INPUT MAPPING > C37 Pxx >
> FUNCTION: CONTACT
> SENSOR: CONTACT
> NAME: GEAR
To configure the GEAR contact alert for retractable landing gear:
Install the GEAR contact that when the landing gear is up, the state of the contact is UP and when the landing gear is down, the state of the contact is DOWN.
• SETUP MENU > AIRCRAFT INFORMATION:
> LANDING GEAR TYPE: RETRACT
> LANDING GEAR CHECK SPEED: (set as appropriate for your plane)
> LANDING GEAR OVERSPEED: (set as appropriate for your plane)
To configure the GEAR contact alert for amphibious landing gear:
• Install the GEAR contact that when the amphibious landing gear is configured for landing on water, the state of the contact is WATR and when the amphibious landing gear is configured for landing on land, the state of the contact is LAND.
• SETUP MENU > AIRCRAFT INFORMATION:
> LANDING GEAR TYPE: AMPHIB
> LANDING GEAR CHECK SPEED: (set as appropriate for your plane)
> LANDING GEAR OVERSPEED: (set as appropriate for your plane)
• SETUP MENU > SYSTEM SETUP > AUDIO SETUP > LANDING GEAR > VOICE


As for the actual annunciations, those are in the pilot's guide. Here's what you'll hear for each:

“Check Gear” : The aircraft is configured as a
Retractable gear, and the Landing
Gear is UP, and the aircraft is
descending through the configured
minimum warning speed.

“Gear Overspeed” :
The aircraft is configured as either a
retractable or amphibious gear, the
landing gear is not UP, and the
airspeed is exceeding the configured
maximum gear down speed.

Monday, September 13, 2021

9/13/21 Electrical / Dynon-SDS

 A variety of electrical tasks completed today:

The Hall Effect Ammeter was connected.   It required +5 volts (C37 pin 18 red/white).   The sense wire was connected to C37 pin 31.   It is positioned on the two alternator + leads.  The vendor sent me some files and will send another one for the Dynon.

The EMS orange (C37 P11) and yellow (C37 P12) wires were assigned to the Landing Gear and Canopy contacts.  A file was loaded into the Dynon to not warn below 1900 RPM.   The forward connections haven't been made yet.

The SDS tach was still  reading lower than the Dynon so under the EMS Hardware Calibration, the pulses per revolution were increased again from 2 to 3.  There's three magnets on the flywheel.

The copilot side Com antenna strake cable was connected to the Nav/Com panel.


Wednesday, April 21, 2021

Chapter 22 - EarthX Battery connection to Dynon

The Dynon forum was helpful and provided some information on connecting the EarthX LED to the Dynon EMS:


https://forum.flydynon.com/threads/earthx-lithium-battery-bms-configuration.11789/


 1) Connect the EarthX fault monitoring wire to any unused General Purpose input (type = A or C) on the SV-EMS-220. (Pins 4, 7, 8, 9, 10, 11, 12, 20, 21, 22, 23, or 31)


2) Configure the input in the EMS SETUP> SENSOR INPUT MAPPING. FUNCTION = CONTACT, SENSOR = CONTACT, NAME = EARTHX (select CUSTOM and enter a suitable name)

3) Configure the EARTHX CONTACT in EMS SETUP> SESNOR SETUP.
ALARM = SELF-CLEARING
MAXIMUM GRAPHICAL DISPLAY = 5.0 VOLTS
MINIMUM GRAPHICAL DISPLAY = 0.0 VOLTS
RANGE 1
ENABLE = YES
NAME = ALRM
COLOR = RED
TOP = 1.0 VOLTS
BOTTOM = 0.0 VOLTS
RANGE 2
ENABLE = YES
NAME = (NOT SET)
COLOR = BLACK
TOP = 5.0 VOLTS
BOTTOM = 1.0 VOLTS

Ranges 3, 4, and 5: ENABLE = NO

4) Place the EARTHX CONTACT widget on the 100%, 50%, and 20% EMS screens using the EMS-SETUP> SCREEN LAYOUT EDITOR


Friday, April 2, 2021

Tosten control stick modification


The Tosten flight controls that I'd ordered (several years before I needed them) were to tall.   I removed the OEM post, drilled a hole for the roll pin and the stick wires in CZSA.   A dremel grinding stone was the perfect size to enlarge the plastic to accomodate CZSA.  
The PTT trigger and spring are the most challenging parts when re-assembling.  My sticks have the palm rests which might provide better clamping on CZSA.


Update - After Phase I, the PTT button was taking more pressure to activate, probably because I was abusing the PTT with a death grip.  I contacted the seller and he sent me a board that had two switches on it that apparently were for a different model of stick.  I unsoldered one of the new buttons and replaced the bad one.  I really like the top hat coolie switch for trim.  The AP disconnect is a recessed button under the middle finger.  I didn't get the additional switches for flip/flop but at times, it might be handy, but it might also be easily bumped.


An advantage of the extended strake is that there can be less restriction on left/right stick deflection.


The position of the forward latch may be a factor on stick height.  Having an open latch interfering with the stick can be a logical reminder to latch the canopy before taking off.


Finished product.   The canopy latch is not per plans.


Thursday, March 25, 2021

Chapter 22 Dynon AP Servo wiring


The autopilot servo (SV32 and SV42) wiring is different from other Dynon network cables.   Power and the yellow disconnect wires are not connected to the network.   Since the network is a party line, I combined /spliced the data pairs to make a Y cable.   The diagram below was followed except one of the right hand female connectors was eliminated by splicing the data pairs together.


Tuesday, March 9, 2021

Chapter 22 - Electrical System - VPX installation


A couple 1" and 2" pieces of angle are held by screws with locking nuts to the center stack.  Nut plates were installed on the bottom side.  The VPX mounting bracket was used to accurately locate the mounting holes.


An angle bracket attaches to the bottom lip of the instrument panel.   The other end attaches to F28, leaving enough clearance for the IP cover's flange.  6 nut plates were used.


I'm installing terminal strips to terminate the VPX leads to for easier maintenance and flexibility.  A location above the VPX will keep the leads short so disconnecting the connectors and removing a few screws will make it easy to remove or replace the VPX if needed.  I marked a spot on the center stack where a nut plate will be located.

A punch in the mark to keep the drill bit from walking.

A #19 bit hole for the nutplate jig is made.

The locating peg is placed in the #19 hole.

The top #40 hole is drilled next.

The jig is flipped over, with the #19 and #40 holes used as a guide for the jig and the second #40 hole is drilled.

The center hole is enlarged.

A countersink with a #40 pilot is used to deburr and countersink the holes for the flush rivets.

The appropriate length rivets and nut plate is installed.


Bracing and more nut plates are added to support the outboard side of the terminal deck.  J12 is populated with #16 wire to the terminal.  Smaller wire if appropriate can be run from the terminal to the load.  If I was super weight conscious, direct wires could be run to the VPX to eliminate the terminals.  Holes were drilled along the edges to accommodate ties or lacing tape to secure the wires.   

J1 is the only connector not terminated and is wired directly to the EFIS.  J2 only has 19 wires (no connection to pin 13), so uses two 12 connection terminals.


View from the pilot side.  I opted not to use the center stack as the inboard support for this tray so the avionics could be removed as a group.

Monday, February 8, 2021

Chapter 22 Electrical System - Instrument Panel progress

The bottom tray needs to be lowered .1" for adequate clearance.


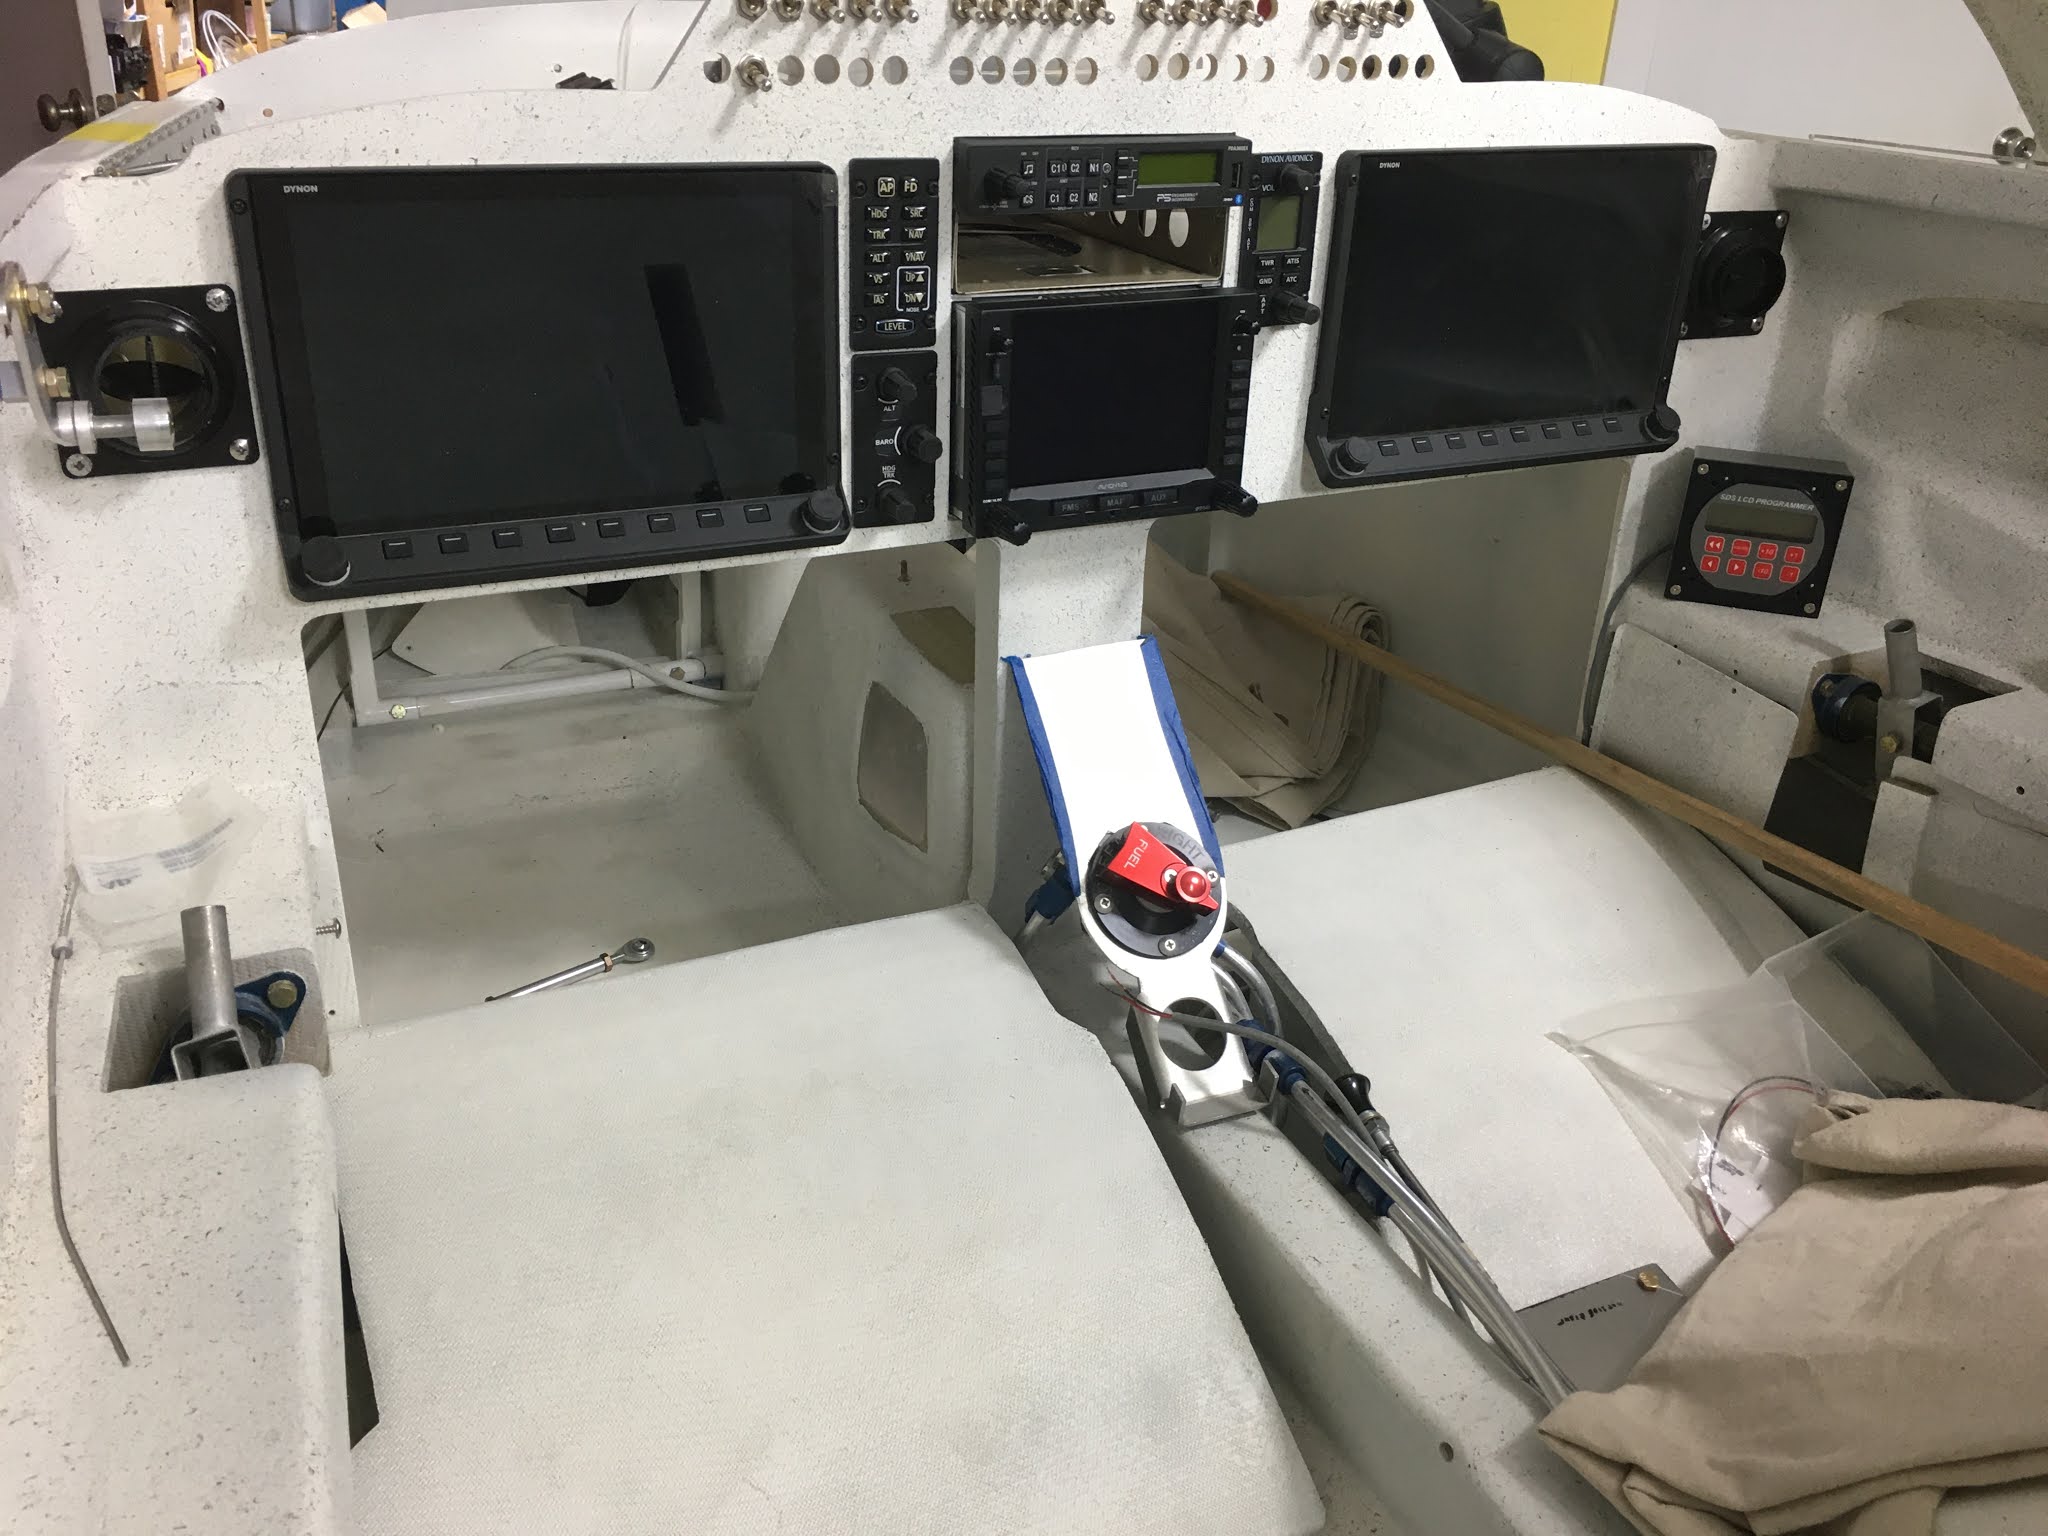
The trays were removed, instruments stacked to check fitment. The AP and radio button panels are swapped in this photo.


Large washers were used to get adequate spacing between the front bezels.

The washers are visible through the front panel holes.

Tuesday, December 15, 2020

Chapter 22 Electrical - Audio Panel - headset jack install.

Test fitting.  Still deciding where to mount the SDS interface.
PS Engineering unit with custom harness.
Plate for audio jacks.  Version 2.

Printing on the wires identifies function, jack, pin and colors.
The wires need to be fed through this back shell before pinning the connector.  Doh!
One connector done.  The other needs depinned. 
Unit secured in tray with jacks connected to the back plane.
Test fit is good.   Jack doesn't interfere with canopy strut.

Neat features.  Multiple music sources available.

Paired a phone and tested charging, bluetooth streaming music and caller ID.  Phone capability is handy for IFR clearances over the phone and other pertinent calls.  

Thursday, December 3, 2020

Chapter 22 Electrical System progress

The nose gear harness was a rats nest.  The previous builder had some assistance from Jack.  Not all the colors matched the schematic.   Took an evening to untangle and lace it up nice.  Tested the emergency extend function.

I soldered and used heat shrink on some of the bare splices in the nose gear harness. 

There's approximately 70 wires for probes, EI and EFI not including the shield ground wires.

The white enamel paint on the motor mount is going to need touched up.


Sunday, November 15, 2020

Chapter 22 Electrical - Firewall Bulkhead connectors and MAP sensors

Two 37 pin Amphenol bulkhead connectors penetrate the firewall.

Dynon and 2 SDS MAP sensors mounted.

One 37 pin Amphenol cannon plug is for the CHT and EGT wires.

Mostly SDS and some Dynon EFIS wires are in this cannon plug.


Wednesday, August 5, 2020

NanoVNA - winglet antenna

The screen is a little cluttered because I left everything default.  The yellow line depicts the CH0 input that's connected to a winglet antenna.  The yellow 1 marker is at 117.043 Mhz.  Later I decluttered the screen and added the SWR graph.  There's YouTube videos how to use this.