Chapter 3 is 19 pages long. It includes a list of basic required tools, recommended tools, items used occasionally & can be borrowed.
Some tools can be made such as sanding blocks, long straight edge, epoxy balance, hot wire cutter, and jig table.
Materials are covered. The types of fiberglass (BID & UNI), epoxy, foam.
Construction, repair and inspection methods are explained.
Water lines and Butt lines are explained.
----------------------------
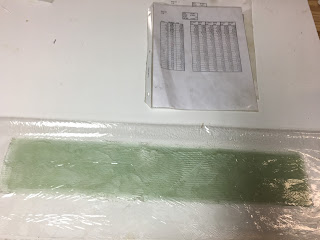
The epoxy to glass ratio by weight is typically 1:1. Wetting multiple layers of glass between layers of plastic on your work bench is often better (quicker and easier to handle) than trying to do one layer at a time. Exceptions might be for long/hard to handle thin layers of glass.
Typically EZPoxy is used by many builders for the tanks even if they're using MGS for the rest of the structure.
Working time/pot life is greatly affected by ambient temperature. Warm epoxy has a lower viscosity and wets better. Warm epoxy can/will exotherm if it's heat isn't dissipated by stirring or spreading out. Fast hardener is more prone to exotherm than slow. Several layups (such as the winglet attachment) in the project have many layers and can easily exotherm if the temperature is high and fast hardener is used.
In cold temps when using epoxy, avoid using heat that produces CO2. Keep parts above the dew point. Use peel ply to avoid amine blush or amine bloom. Use heat (lamps or electric blankets) to help provide heat. See Gary Hunter's presentation on Epoxy.
This is my supplemental builders blog for a Cozy Mark IV which is a 4-seat, single engine, homebuilt light aircraft designed by Nat Puffer, with parts and plans supplied by Aircraft Spruce & Specialty Co. The aircraft is built from plans using basic raw materials. It is not a kit aircraft, though many small parts are available prefabricated. The Cozy is similar in design and construction to the 2-seat Rutan Long-EZ, from which it is derived, with approval from Burt Rutan.
Pages
Chapters (Blogger Labels)
- Chapter 01 Description and Introduction
- Chapter 02 Bill of Materials
- Chapter 03 Education
- Chapter 04 Fuselage Bulkheads
- Chapter 05 Fuselage Sides
- Chapter 06 Fuselage Assembly
- Chapter 07 Fuselage Exterior
- Chapter 08 Head Rest and Seat Belts
- Chapter 09 Main Gear & Landing Brake
- Chapter 10 Canard
- Chapter 11 Elevators
- Chapter 12 Canard Installation
- Chapter 13 Nose - Nose Gear & Brakes
- Chapter 14 Center Section Spar
- Chapter 15 Firewall
- Chapter 16 Control System
- Chapter 17 Pitch and Roll Trim
- Chapter 18 - Canopy
- Chapter 19 - Wings/Ailerons/Attach
- Chapter 20 - Winglets & Rudders
- Chapter 21 - Strakes
- Chapter 22 Electrical System
- Chapter 23 - Engine Installation
- Chapter 24 Armrests Seats Fairings
- Chapter 25 - Finishing
- Chapter 26 Upholstery
- Cozy Builders
- EAA
- FAA
- Flight Testing
- Landing Brake and Center Console
- M Drawings
- Maintenance
- mods
- Skunk Works
- Trip reports
- Wheel Pants
Subscribe to:
Post Comments (Atom)
Relevant links for supplies and other info
- Cozy IV Specs
- Cozy Builders - Google Groups
- Unofficial Cozy Builders Site - updates to plans and much more information (maintained by Marc Zeitlan)
- Cozy Builders Mailing List, POH and other info
- Cozy Builders - Map
- Official Cozy Aircraft Site (outdated site)
- Canard Zone
- Central States Association - Facebook
- COBA Canard Owner and Builder Association
- Builder Sites (maintained by Erland Moen)
- Experimental Aircraft Association
- Rutan Aircraft Flying Museam
- Dennis Butler's Grand Champion
- aerocomposites.aero - Gear legs and fiberglass parts
- Aircraft Spruce Cozy IV Parts
- http://www.wicksaircraft.com/index.html
- 3:23 Composites
- SDS EI EFI
- Cozy Girrrls
- Skycraft Surplus
- www.enginegearonline.com/
- Infinity Aerospace
- NIck's web site
- https://www.stuarthose.com/
- http://www.tostenmfg.com/
- www.eurekacnc.com
- Featherlite (http://aerocad.com) parts
- http://aeroelectric.com/
- www.long-ez.com/
- Earl's Performance Fuel Systems
- FAA Amateur Built Operating Limitations
- FreeFlight Composites
- ADS-B blocking
- FAA - A&P / Experimental Builder Experience
- EZ.ORG moved to ez.canardaircraft.com
- Fiberglass Warehouse
- High Temp Epoxy
- Marc's Nose Gear parts


No comments:
Post a Comment